
How to Use Holly's Homestead: A Real Family-of-Three, 2-Acre Self-Sufficiency Plan
A worked example: 2 acres in cool-temperate Victoria, a family of three, seven animal species, and full food self-sufficiency — walked through every tool on this site in the order that actually makes sense, with numbers from each step.
Everything on this site connects to everything else, and the easiest way to actually see that is to walk through one scenario, start to finish, using numbers pulled from the tools themselves rather than invented examples. This is that walkthrough — the maximal version, covering full food self-sufficiency and seven animal species on 2 acres. Most people won't need all of it, and that's fine.
In a hurry? If you just want a quick shortlist of what to grow and keep without the full planning depth below, the Beginner Starter Kit gives you a fast answer based on your space and interests. Everything else on this page is for when you're ready to plan properly.
The scenario
A family of three — two adults, one child — buying 2 acres in cool-temperate Victoria, aiming for full self-sufficiency: growing everything they realistically can, and keeping chickens, ducks, rabbits, sheep, goats, pigs, and bees, with breeding built in from the start rather than added later. Milk and cheese come from the goats; the sheep are kept for meat. This is a deliberately ambitious version of the plan — built this way specifically to show as many of the site's tools working together as possible.
Step 1: Set your climate zone first
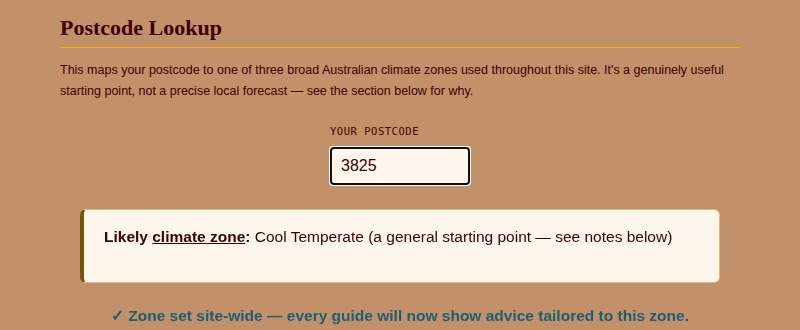
Before anything else, because it colours every guide, calendar, and planting window that follows. Find My Climate Zone takes a postcode and returns a starting-point zone. For a property around Warragul in West Gippsland (postcode 3825), that's Cool Temperate — useful to know upfront, since cool-temperate Victoria has a distinct growing rhythm (shorter frost-free windows, different planting timing) compared to, say, subtropical Queensland.
Step 2: Check what's actually allowed before planning around it
Worth doing early, not as an afterthought. Our VIC livestock rules guide covers the detail, but the two facts that matter most for this exact scenario: Victoria has no state-wide bird-number cap, and a poultry farm permit only triggers above 100 birds — nowhere near what a family flock needs. Sheep, goats, and rabbits at this scale fall under ordinary "Animal Production," as-of-right in Farming Zone. Pigs are the one exception: a planning permit is required for a pig farm in every Victorian zone regardless of scale, though a streamlined pathway exists for exactly this size of operation (the Low Density Mobile Outdoor Pig Farm guidelines, covering up to 150 sows). Bees need registration with Agriculture Victoria regardless of hive count — the Beehive Yield Planner flags this directly, which we'll see in a moment.
Given all this, Farming Zone is the right choice of land for this scenario — not Rural Living Zone, which specifically prohibits intensive animal husbandry and would put a seven-species breeding operation on shakier ground. Worth confirming this kind of detail with your specific council before purchasing, but it's a solid starting assumption for a Gippsland-area rural property.
Step 3: The Block Planner → Yearly Food Planner → Block Planner loop
This is the core loop, and it's worth understanding why it works in this order. Block Planner first gives you a rough sense of whether your idea fits at all. Yearly Food Planner then works out specific growing and keeping quantities based on what your household actually eats. Block Planner again, now with numbers instead of guesses, confirms the refined plan still fits — and shows you precisely where the space is going.
3a. Block Planner, first pass
2 acres is 8,094m². Household size 3. Adding a starting guess at all seven species plus the household's staple crops (using the tool's own "fill staples for my household" shortcut):
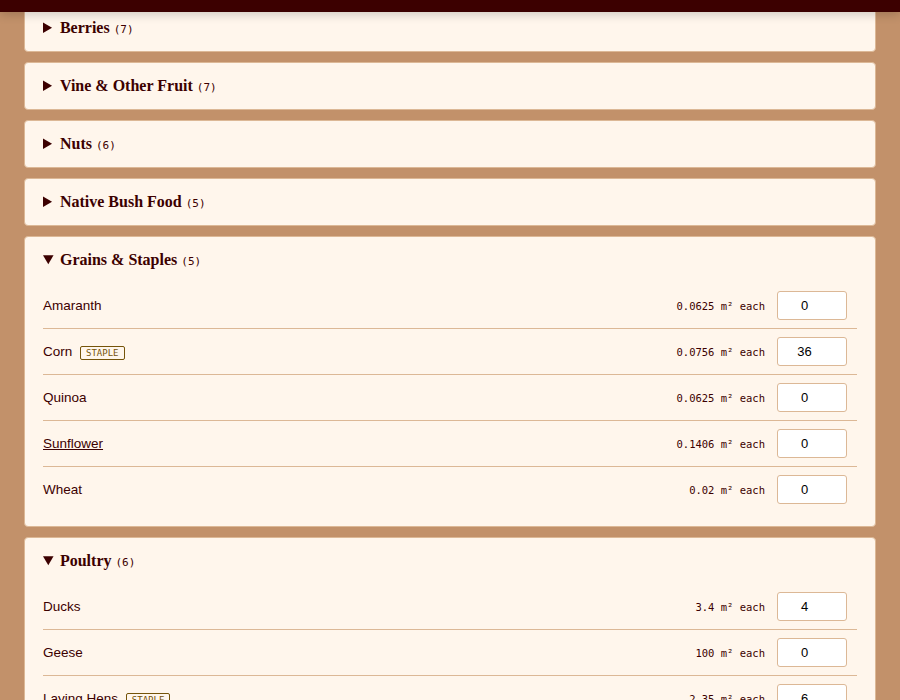
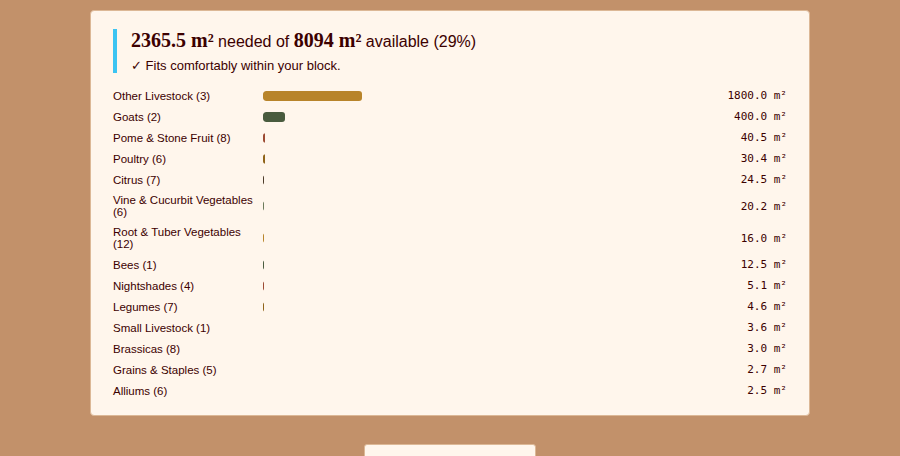
Reassuring at this stage — even a rough first pass leaves most of the block spare. But "fits" isn't the same as "correctly sized," which is exactly what the next step fixes.
3b. Yearly Food Self-Sufficiency Planner
Household size (3), buffer (20% default, sensible for a first year), and food items added one at a time. A handful of results from this pass:
- Potato: target 375/year → grow roughly 11.4 m² across the season
- Tomato: target 375/year → roughly 46.9 m²
- Carrot: target 375/year → roughly 5.8 m²
- Apple (dwarf tree): target 375/year → plant roughly 3 mature trees
- Eggs: target 375/year → keep roughly 2 laying hens
- Goat milk: target 375 litres/year → a realistic yield from 2 dairy goats
- Lamb, pork, rabbit: each landing around 38kg/year at this household's eating frequency
- Honey: 38kg/year, comfortably inside what 2 hives can produce even in a first year
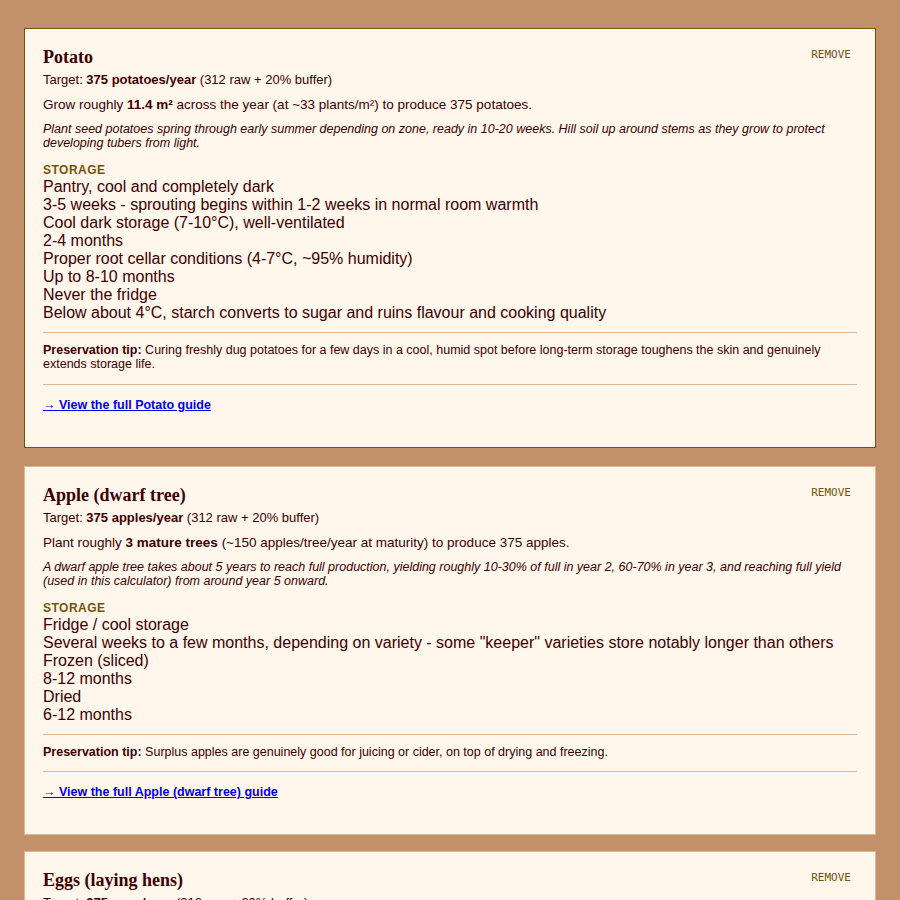
Worth noting: these figures use the tool's default portion size and frequency per item, which you can adjust per food to match how your own household actually eats — more potato, less lamb, whatever your pattern looks like. The numbers above are a unedited example of what the tool returns, not a hand-picked best case.
3c. Block Planner, second pass
Feeding the Food Planner numbers back in — 3 apple trees instead of a guess, 36 potato plants confirmed rather than assumed:
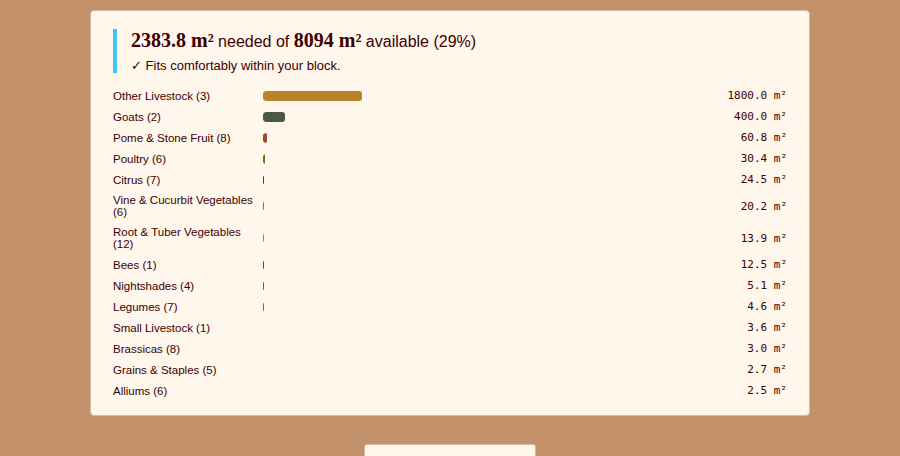
This is the point of running the loop twice: the refined number confirms the plan, rather than just hoping the first guess was close enough.
Step 4: What it's worth, and what it costs
Two different questions, two different tools, using the same items from Step 3.
4a. Savings Calculator
Entering the same crops and animals — potato, carrot, tomato, apple, laying hens, dairy goats, honey, sheep, pigs, rabbits, ducks — at realistic quantities for this property:
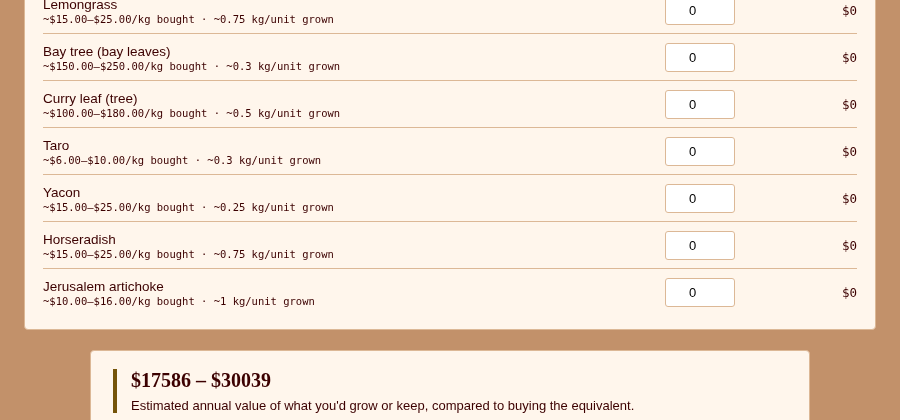
Worth being direct about why this number is trustworthy rather than optimistic: it uses the exact same yield data as the Yearly Food Planner in Step 3, not a separate, more generous estimate built to look impressive.
4b. Cost Estimator
Flip the question around: what does building all of this actually cost? Every animal here gets its own housing line, not one generic guess:
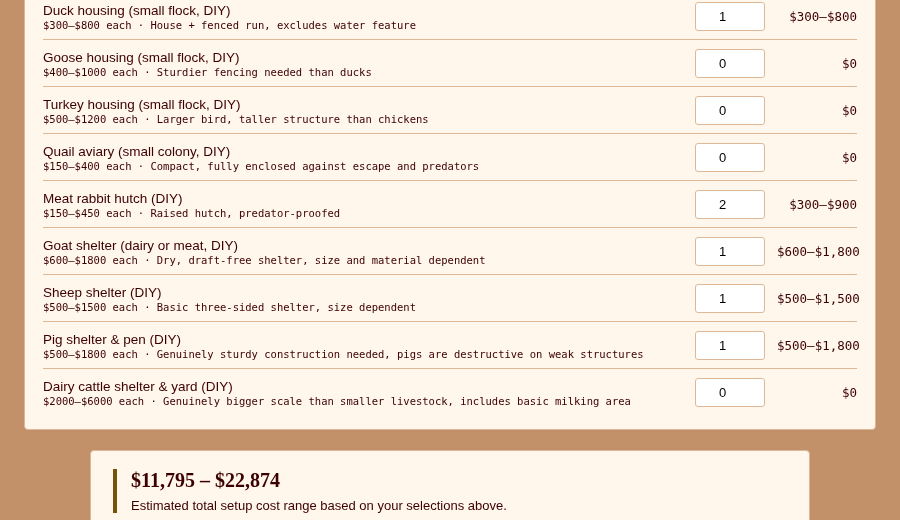
Put the two together and the picture is encouraging: even at the higher end of setup cost, the estimated annual value alone could realistically recover it within a year or two — though timelines depend enormously on how quickly animals reach production and how established the garden becomes.
Step 5: Build detail, per species
The Cost Estimator gives a fast dollar range; these seven planners give the build-level detail behind each of those numbers — footprint, materials, and a build-time estimate.
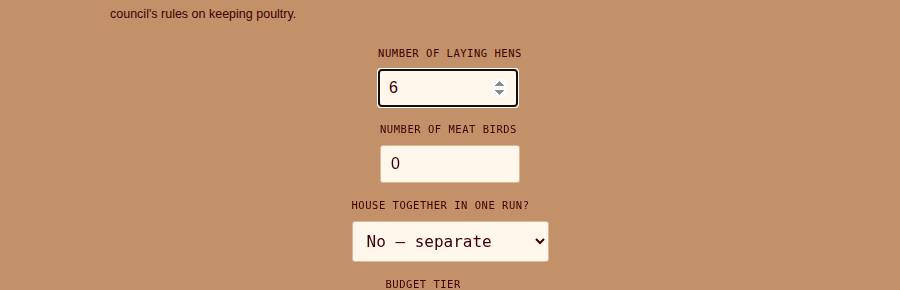
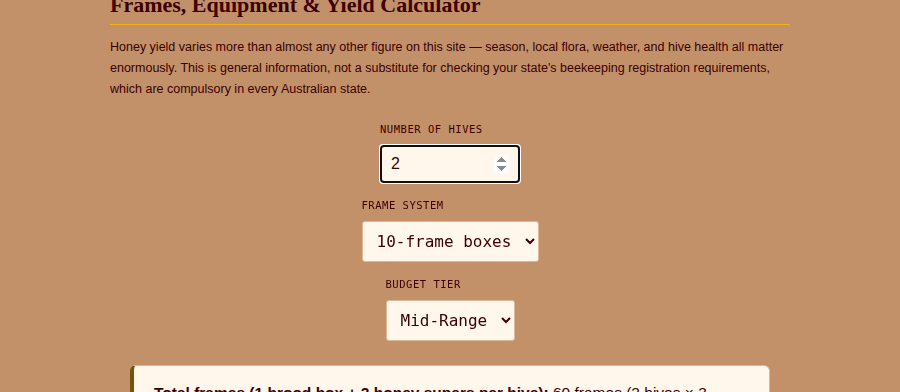
The remaining five follow the same pattern — footprint and build time for exactly what this property needs:
- Duck Housing Planner: 4 ducks → 1.6 m² house, 5.6 m² run, ~18 hours
- Rabbit Hutch Planner: 6 rabbits → 6.0 m² hutch, 6.0 m² exercise run, ~22 hours
- Sheep Paddock Planner: 4 sheep → 4.8 m² shelter, 80 m² minimum paddock, ~25 hours
- Goat Paddock & Shelter Planner: 2 dairy goats → 2.8 m² shelter, 37 m² minimum paddock, ~22 hours
- Pig Pen Planner: 2 pigs → 2.4 m² shelter, 50 m² minimum yard, ~23 hours
Step 6: Keeping the place running
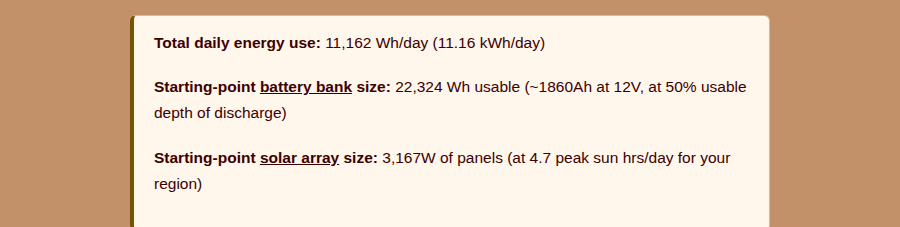
Three tools, sequenced on purpose: solar load depends on the household already sized in Step 3, rainwater depends on the property's roof area, and firewood matters a great deal more in cool-temperate Gippsland than it would further north.


Step 7: Into the ground
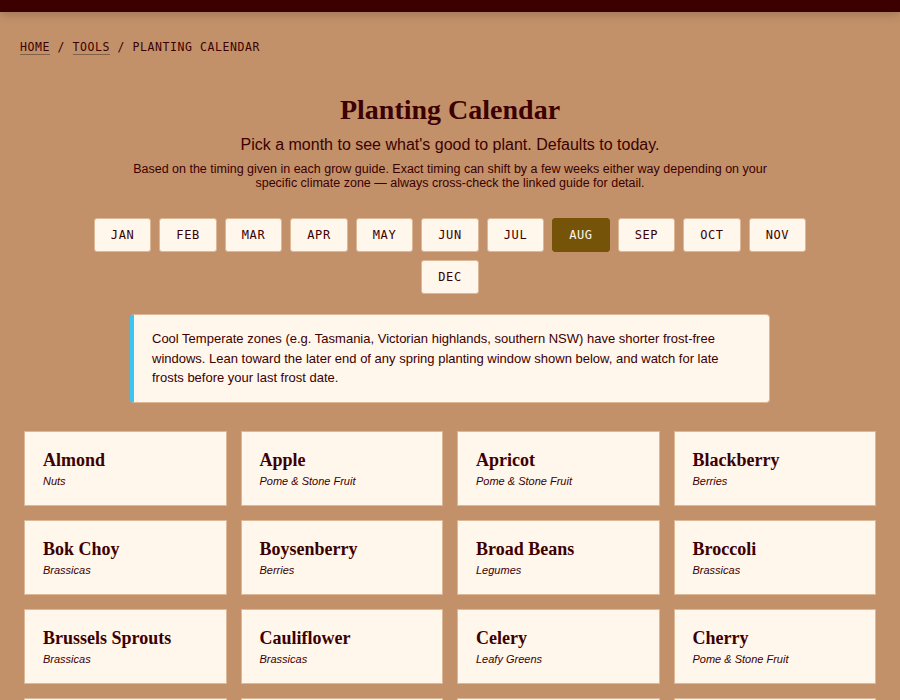
With the climate zone set in Step 1, the Planting Calendar is already zone-aware from the first visit — no re-entering anything.
From here, every guide settled on — potato, tomato, carrot, apple, and the rest — has a printable PDF version. For this scenario, that's the physical payoff of everything above: a pin-it-on-the-shed-wall reference for each crop and each animal, not just a webpage you'll lose track of.
What you'll come back to
Everything above is a one-time (or once-a-season) planning pass. These are the tools this same family would realistically open again and again once the property is actually running:
- Harvest Calendar — zone-aware, same as planting, for knowing what's actually ready
- Companion Planting Checker — useful every time the vegetable patch gets replanted
- Crop Rotation Planner — matters more in year two and beyond than in year one
- Feed & Hay Budgeter — annual hay and grain quantities for the goats, sheep, pigs, and rabbits together
- Breeding Date Calculator — directly relevant here, since breeding was part of the plan from day one for every mammal on the property
- Production Calendar — the seasonal rhythm of eggs, goat milk, and honey together, so nobody's caught out by a quiet month
- Pantry Inventory Planner — once harvests and preserves start coming in, this is where "how much have we actually got left" gets tracked properly
- Symptom Search and the Troubleshooting Directory — for when something's actually wrong and there's no time for the scenic route. Go straight there.
The whole picture, in one place
| Question | Answer for this scenario |
|---|---|
| Climate zone | Cool Temperate (postcode 3825, West Gippsland) |
| Zoning | Farming Zone — correct for mixed breeding at this scale; pig permit needed via the streamlined small-scale pathway |
| Space needed vs. available | 2,383.8 m² of 8,094 m² — 29%, fits comfortably |
| Estimated annual value | $17,586–$30,039 |
| Estimated setup cost | $11,795–$22,874 |
| Solar | 11.16 kWh/day — ~3.2kW array, ~22kWh starting battery bank |
| Rainwater | 128,700 L/year off a 220m² roof — ~16,000L minimum tank |
| Firewood | 4.2m³ seasoned hardwood/year, 5.0m³ with buffer |
Every number above came directly from running the tools with this scenario's inputs — nothing here was estimated by hand. That's the whole idea behind building the site this way: pick your own numbers, and the same tools will do the same work for your actual situation.
Related reading:
- Homesteading in Australia: The Complete Guide — the broader picture this scenario sits inside
- The Real Cost of Setting Up a Homestead — a prose sanity-check against the Cost Estimator's numbers above
- VIC Backyard & Small-Acreage Livestock Rules — the full detail behind Step 2
Frequently Asked Questions
What order should I use the tools on Holly's Homestead in?
Set your climate zone first, since it colours every guide and calendar afterward. Then check your state's legal page before designing around specific animals. From there, the Block Planner and Yearly Food Self-Sufficiency Planner work best together in a loop: plan roughly, work out food needs, then refine the layout with those numbers.
Can I really plan a whole self-sufficient homestead before buying land?
Yes, within reason. The Block Planner, Yearly Food Planner, Cost Estimator, and Savings Calculator all work from a target land size and household rather than a specific existing property, which is useful for comparing regions or block sizes before committing to a purchase.
Do I need to use every tool on the site?
No. This walkthrough is deliberately the maximal version, covering seven animal species and full food self-sufficiency. Most households only need a handful of these tools. The Beginner Starter Kit is a faster way to get a shortlist if you don't need the full planning depth.